
Picture shows the window you will see first after the PP2CAN startup. There are several parts of the window. The red letters indicate these particular parts.
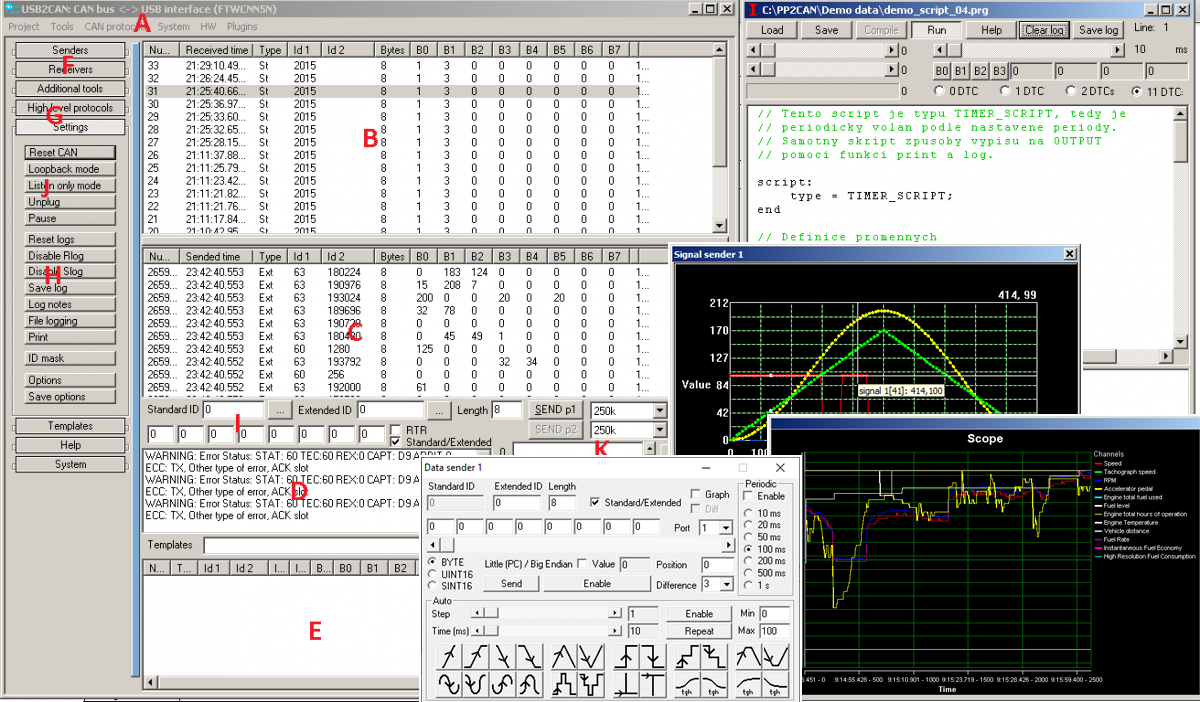
A) Program menu. This menu gives you access to the tools for communication analysis, data generation, system tools and others.
B) Received messages log window. Contains history of received messages. If not otherwise specified in filter configuration, all messages are received by default. You can sort the data by clicking the caption of the column. Click the Disable R log button to disable (or hold up) logging into this dialog.
C) Sent messages log window. If not otherwise specified in filter configuration, all messages are received by default. You can sort the data by clicking the caption of the column. Click the Disable R log button to disable logging into this dialog. Contains history of sent messages.
D) Information window for displaying the program messages and CAN bus API interface.
E) Predefined messages database window. To simplify your work, you can create frequently used message databases. The list of these messages is than displayed in this window.
F) Bus communication analysis and data generation toolbar.
G) High-level CAN protocol toolbar.
H) Auxiliary toolbar (Print, Help, etc.)
I) Setting and generating panel for manually generated message. After the message is sent, you must fill in the identifier, select the type and select whether it is data frame or RTR-type message (data request). Then, in case of data frame, select its length (0-8) and set the data bytes. The lowest data byte (B0) is on the left, the highest is on the right. Press the Send msg button to send the message. Standard identifier ranges from 0-2047 (11 bits). If a message with extended identifier is being sent, you must fill in the extended part as well (18 bits). The range is 0-262143.
J) Control panel of the program.
K) Predefined messages database panel. It is useful to store frequently used messages in the database of predefined messages. By doing this, you can avoid constant overwriting of identifiers and data when sending manually. Press the Add button to add the filled message into the database. You can than save the database (by pressing the Save button) or load it back (by pressing the Load or Merge button). You can add a comment to a message as well. Use the Set description button to add the comment. Double-click the database item to copy it into the editing field for manual message sending. If you use the mouse together with the Ctrl (Shift) button to select more items, you can send them together by pressing the Send selection button. You can save these message selections into the message selection lists. You can define up to 10 particular selections. In addition, compared to message logs, the database shows the identifier in binary format.